Spring has Sprung

Crimson-Flowered Broadbean

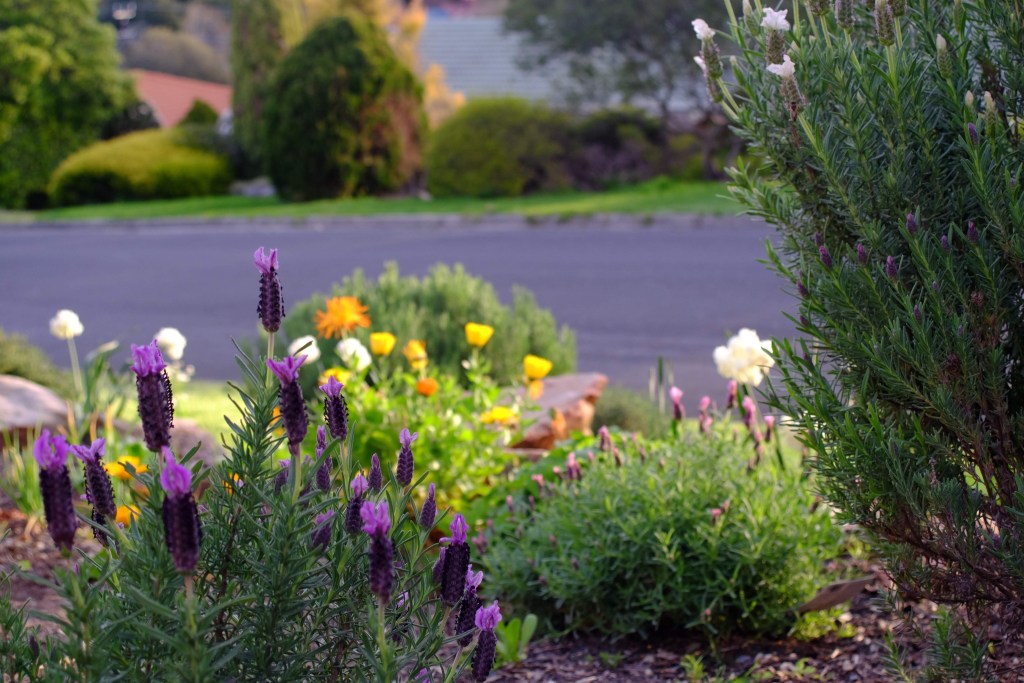
We are finally getting some sunny days – not many, but a few. It’s still chilly, but it is wonderful to see the sunshine!

Most of the fruit trees are covered in blossom, even the tiny little miniature peach tree I bought on a whim a few weeks ago. It’s called a Pixzee Mini Peach, and I could not resist its adorable tininess when I saw it at the Big Green Shed.

‘Pixzee’ Peach Tree

Bees are going absolutely crazy out there – they don’t know where to start, whether it’s the apricot tree, the plum trees, or the rather spectacular Crimson-Flowered Broadbeans. These heirlooms will produce regular looking broadies but look super cool in the veggie patch.

I’m also growing a big block of dwarf broadies, which also look lovely – but not as speccy.

In weather like this, I want desperately to be in the garden, yet it is still too cold to plant anything in the ground. So all I can do is get ready for warmer times.

Celeriac

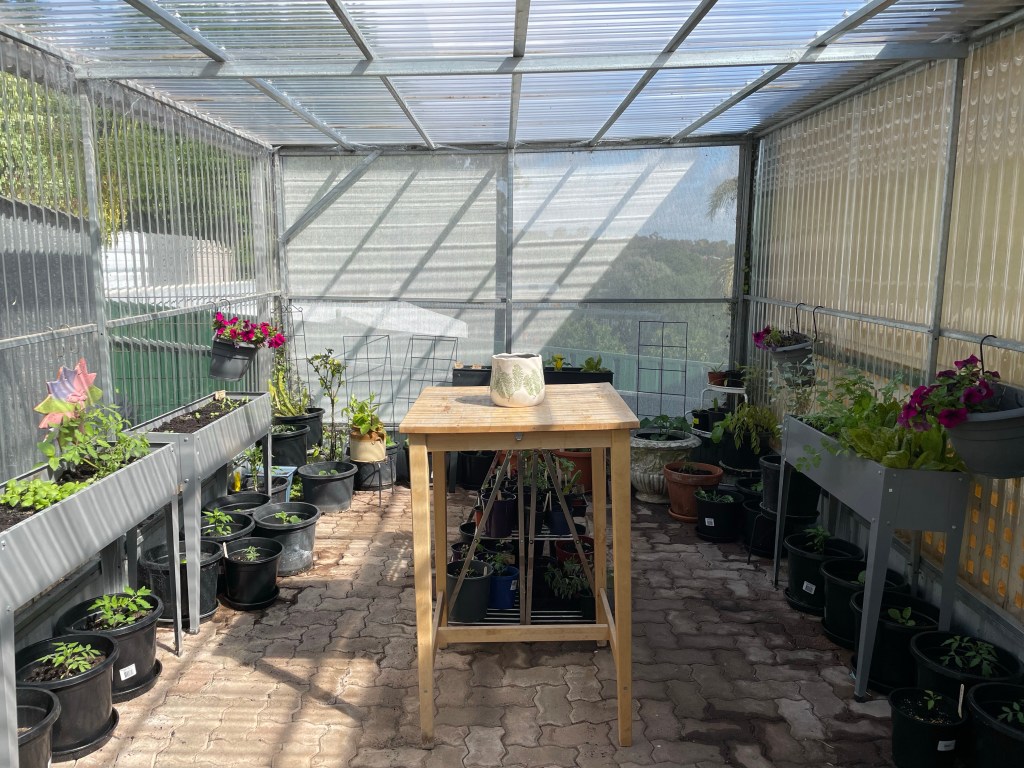
I’m growing celeriac in one of the wicking beds – a bit of an experiment to see if root veggies will do well in the greenhouse. Of course, I should have tried something that a) grows faster and b) I have grown before. But I am always adventurous, and I had the seeds, so I gave them a crack. The thing with celeriac, is that it is glacially slow. It takes well over 100 days to reach maturity. I might not have the patience for that, tbh.

Celeriac is such an interesting plant, with its cool warty roots and lovely nutty taste. It’s also pretty expensive to buy – at my local greengrocer, which is not overly expensive, individual roots were selling last week for eight dollars each!

The plants have grown beautifully and look super healthy – but they are not yet swelling at the roots. To help boost them along, I thinned the plants out today, which I hate doing, but it really needed to be done to give them the space they needed to expand. Then I trimmed some of the extraneous side leaves so the plants would put more energy into root development. Lastly, I gave them a side dressing of granular fruit & vegetable fertiliser.

Seedlings

I’ve been growing eggplants, tomatoes, chillies, basil, and capsicum from seed in the greenhouse for the past month. With the warmer weather, they have started to take off!

One variety of tomato, Violet Jasper, was ready to be pricked out into larger pots today. This year, I’m experimenting with recycled yoghurt pots as the Stage 1 pot – they are a good size (not too big not too small), free (free-ish anyway, given we buy the yoghurt, but we do that anyway), and will reuse the pots several times before they go in the recycling bin. My husband drilled drainage holes in the pots for me, and I filled them with my proprietary blend of equal parts seed raising mix, perlite and coarse propagating sand.

As only the Violet Jasper were ready, I used the remaining pots to plant some zucchini Cocozelle, pumpkin Golden Nugget, and cucumber Poinsett. There are varying opinions about whether growing zucchini and other curcubits for planting out is a good idea – some say not, others yes. I’ve done both ways, and my opinion is that it doesn’t matter very much. I want to take advantage of the greenhouse to start my plants while it is still cool outside, so I’m doing it this way. It’s so much colder where I live than on the plains, so taking the risk of transplant shock is worth it to me.

I also planted out a feijoa (Pineapple Guava) tree in a pot. My husband is originally from New Zealand, where the feijoa is beloved. They don’t really appeal to me (I don’t enjoy the strong perfumey flavour), but he will love having them around and I’ll enjoy growing the tree. I do quite enjoy feijoa jam, so if the tree produces enough I may make that one day.

Feijoa

Building Jobs

As my husband had his drill out, I asked him to help me build a new climbing frame for climbing beans (similar to the one below).

Climbing Frame

He also fixed the passionfruit vine trellis, which was sagging due to the heavy weight of the passionfruit. Next week I will lean the axe against the passionfruit as a reminder that if it doesn’t produce any fruit this season, it will definitely get the chop.

I also built several trellises for my future pumpkins.

Picking

This time of the year is not as abundant in the garden as the Summer months, but we are still picking some veggies to supplement our diet. We are picking heaps of greens (lettuce, spinach, herbs), rhubarb, and cumquats.

Cos Lettuce

To fill in the hungry gap, I planted more lettuce seeds and spring onions today. About two weeks ago I also planted more bok choy and some rocket. Hopefully these will keep us going until the Summer plants take off!

I’m so excited for the next few months in the garden!

How about you – what are you doing to prepare for the warmer weather in your patch?

What I’m (Hoping) To Grow This Summer

Greenhouse

As I have already mentioned, this Summer, pumpkins will feature heavily in my patch.

However, these will not be the only veggies I will be growing in my garden. I have tried not to go overboard buying seeds this Season (a bad habit of mine), and have also tried really hard to only buy seeds for plants I really want to eat. I have been given to garden experimentation in the past, but this season I really wanted to focus on giving up now my increasingly precious garden space to veggies that everyone in the family will really want to eat and that grows well in my microclimate. So I’m farewelling okra, even though we quite enjoy it, because it is just not productive enough in my garden to give it garden space. I’ll buy a bag of frozen okra if we want some.

Aside from the pumpkins (Anna Swartz, Queensland Blue, Butternut, Buttercup, Jack Be Little, and Galeux D’Eysines), I will grow climbing beans, a melon or two, cucumbers, zucchini/squash, tomatoes, eggplant, capsicum, basil, and chillies. The varieties are:

  • Eggplant: Rosa Bianca, Ping Tung Long, Listada de Gandia, Tsakoniki, Caspar;
  • Tomato: Violet Jasper, Rapunzel, Barry’s Crazy Cherry, Yellow Mortgage Lifter, Black Russian, Black Cherry, Jaune Flamme;
  • Bean: Australian Butter, Black Valentine, Snake Red Noodle, Edamame;
  • Melon: Sugar Baby, Delice De La Table, Crimson Sweet;
  • Cucumber: Richmond Green Apple, Marketmore, Heirloom Mix;
  • Zucchini/Squash: Golden Scallopini, Rondo De Nice;
  • Chilli: Heirloom Mix, Jalapeño;
  • Capsicum: Yolo Wonder.

These will be planted in the patch (pumpkins, zucchini, melons, beans), in containers (chillies, capsicum) and in the greenhouse (the rest). I have already planted the tomatoes and eggplant seeds in the greenhouse so they get an early start. As they grow into seedlings I will pot them on into larger pots so they develop stronger root systems before planting out in large wicking beds in the greenhouse. I find that even in the hottest of our Summer days, eggplants, cucumbers, and tomatoes do better in the greenhouse than in the patch – in fact, before we had the greenhouse I could never grow a single cucumber. My mother, who lives about half an hour away on the Adelaide Plains, is the queen of cucumber growing – I could not work out why I couldn’t grow cucumbers successfully.

Part of the issue is our elevation. We live on a hilltop at an elevation about 200m above sea level, compared to the Adelaide Plains (elevation about 50m above sea level). While our elevation does not compare to the hills and mountains we saw on a recent trip to New Zealand, it does make a difference. Family members living on the Plains report ripe fruit on tomato bushes and mulberry trees at least six weeks before our trees even show immature fruit. My cousin, who lives about an hour and a half north of us, is already picking asparagus, while mine is yet to poke its head up (my asparagus is also not planted in the best spot – I will need to move it in Autumn). My eldest daughter, who lives 15 minutes away downhill, has ripe fruit on her apricot tree several weeks before we do on ours. Our backyard microclimate is quite a lot cooler than her sunny backyard just 15 minutes away.

Understanding the impact of microclimates can make such a difference to growing success in your patch. I can’t grow pumpkins in the greenhouse (too humid, not enough space), but being fortunate enough to have a greenhouse means that I can grow other fruiting vines that need an extra boost of warmth.

What are you planning to grow in your veggie patch this Summer? Let me know in the comments!

Weekend Garden Jobs, 16-17 August 2025

It’s daffodil time!

There comes a point when one has a dreaded lurgy, and it will differ for each person, when the thought of staying in bed one moment longer is just unbearable.

That moment was yesterday (Saturday) morning. The sky looked blueish enough, my cough was less hacky, and I thought, enough.

Rugged up well so I would not make my cough worse, I ventured outside, where I discovered my daffs and jonquils were in full bloom. I usually don’t pick them, because I love them in the garden, but there were so many I decided I could afford to fill a vase.

Saturday

My first job though was to dig over the chopped down green manure beds. Last week, I had hacked back the green manure and left the roots to release their nitrogen. This weekend, I dug them into the soil. I will leave them again for another week before digging them over again.

I was very pleased to note that when I dug over the bed near the chicken coop, I only found a small handful of roots and rocks. Last time I dug over that bed (in Autumn), I dug up a whole bucketful of horrible roots and rocks. I also noted that the soil right across the veggie patch is returning to a healthy state after my experiment with no-dig gardening went awry.

After digging these beds over, I sprinkled them with pelletised chicken manure and rock dust, and raked each one over.

Rock dust soil improver helps to remineralise the soil

Soils around the world, including Australia, have become progressively demineralised. While agricultural soils are the most impacted, home garden soils can also be affected. Rock dusts are a relatively, cheap, accessible, and organic method of improving the mineral content of the soil.

You can buy rock dusts from a range of sources, but I bought this bag from the Diggers Club when I ordered some seeds and plants recently. I do not apply rock dusts annually – I think I last applied some a couple of years ago. However as I am trying to repair my soil, I decided I would do it again this year.

It’s easy to apply. Just choose a clear day with little wind, mask up so you don’t breathe any in, and sprinkle it lightly on top of your soil. Instructions say a ‘handful per 1 metre square’ – however I have little tiny bird lady hands, so that doesn’t help me much. I just sprinkle what I think looks about right. Scientific!

Rake and water in. That’s it!

I also sprinkled a little on each potted fruit tree. I have four fruit trees in pots at the moment, including a new pink finger lime and a mini peach tree that I bought because it was so cute. I don’t even know what kind of peach it produces.

Then the rain came, and I headed inside so I would not get crook again.

Sunday

Sunday was supposed to be wet and horrid, according to the AI (Google Home), but my standard boring human intelligence informed me (by looking out the window) that the day had dawned clear and perfect. So out I went again, determined to spread sheep manure around my fruit trees, a job that I do every Winter. I am late to this task, preferring to do it in July rather than August, but better late than never.

You know you’re feeling better when you can spread sheep manure.

Every tree received a sprinkle of organic fruit tree fertiliser, a sprinkle of rock dust, a bag of sheep manure, and some mulch. What lucky trees!

I feel so dang virtuous!

You know what else I feel? Actually better – as in, well.

I honestly believe that spending time in the cool, fresh air and sunshine, surrounded by some healthy dirt and sheep poop, was the cure I needed.

How can I bottle that, I wonder? Maybe I should start a wellness Tik Tok. SheepPoopGirl? ManureMama?

Spring & Summer Garden Planning

The blog, like my garden, has mostly lain fallow for the past few months. I had a major project deadline to reach, which meant I worked 12 weeks worth of hours in 4 weeks. When I finished the project I decided to take a few days off, and predictably fell ill with the plague a nasty cold. All my gardening plans fell by the wayside while I languished in bed, cursing.

But resting makes time for planning. In between watching old episodes of Bones and reading delightfully silly Sookie Stackhouse novels, I also did some planning for my Spring and Summer veggie patch.

You might recall that I decided to grow green manures and legumes in my veggie patch over Autumn and Winter, letting my soil rest for the whole cool season. This was after my disastrous ‘no dig’ experiment, which left me with a rocky, dry, rootbound patch of sad looking soil.

Planning for Water

I am hoping that after this season of rest, my soil will be much happier and willing to take on some heavy producing plants. Think pumpkins, pumpkins, pumpkins. Last season was incredibly disappointing for pumpkins, which I mostly put down to the terrible weather. However, I do not believe that was the only reason. I think that the dodgy soil and my watering regimen was also a problem. I hope that this season’s soil repair efforts will make a big difference, but I have also decided that it is well past time to give up my old-school watering system (hose and sprinkler). This is just not serving me well anymore, partly because I am getting older, and partly because it takes way too much time (the part-time gardener’s most limited resource), and most of all because it just not efficient. This last year was the driest on record. My water bill for the Summer quarter was our highest on record. Something has to give.

From my sickbed I did some desktop research and contacted the highest rated and most consistently well-reviewed irrigation company near me, and asked them to quote. They contacted me five minutes later, and I organised for them to come out a few days later, when I was not so cooty-filled. They said they were not worried about my cooties and came out two days ago. While I sat in the weak sunshine feeling sorry for my snotty self, they measured and took photos, and then sent me an incredible quote (think about 25% of what I was expecting to pay) for an irrigation system for the entire veggie bed and all my backyard fruit trees. They are coming to install next week. If they do a good job, I will ask them to quote for the front yard fruit trees as well. If this system shaves down my Summer water bill and saves me time on watering, it will be money very well spent. If it improves my pumpkin growing experience, it will be worth its weight in…pumpkins. Which are quite heavy.

Last year was a singular disappointment in the pumpkin department. I refuse to live that disappointment again. That is the main reason for investing in the irrigation system. My brother had a spectacular melon patch last year, and he had installed a watering system. Pumpkins and watermelons are cousins, so I figured it was time to stop being a cheap stubborn old biddy and just do it already.

If you build it, they will come. Pumpkins, that is.

Planning for Spring

Spring is a great time to grow a quick cheeky crop of greens

The idea that we have four seasons that correspond to European seasons (but backwards) does not really fly in Australia. The Kaurna people, who are the traditional owners of the Adelaide Plains and the lands on which I live, describe four seasons, but start about a month later than we traditionally believe (i.e. Wirltuti or Spring, starts in October, not September, and Summer or Warltati starts in January, not December). That makes a lot of sense to me, when you consider that our September weather is still often so cold we have continue to run the heating at night. The soil is still often not warm enough to plant tomatoes outside until mid-October.

That means it is possible to plant a crop of cool season plants in Spring, if you plan well.

I don’t plant cool season veggies that take a long time to reach maturity in Spring (i.e. no cabbages or anything that has to form a head), but it is still worth planning to grow quick growing cool season veggies that will fill the so-called ‘hungry gap’ between the Spring and Summer harvest. This Spring I am planting:

  • SpinachHeirloom mix
  • Lettuce – Heirloom mix
  • Mizuna
  • Dill
  • Coriander
  • Bok choy – Baby Red
  • Park Choi – Do Cheong Chae
  • Pak Choi – Extra Dwarf
  • Chinese Broccoli – Kailaan
  • Rocket

I ordered a batch of el cheapo bargain seeds from one of my favourite suppliers, Happy Valley seeds, when they had a $1 a packet sale. Even if a few of these run to seed when the warmer weather hits, it doesn’t really matter much. At $1 a packet, if I can harvest a quick crop I will have done well.

I still have a healthy crop of spinach, bok choy, coriander and dill that I am harvesting now in the greenhouse, and a small crop of celeriac in a wicking bed that I am keeping my eye on. That may not reach maturity before the hot weather hits – it was always a risk to grow it in a wicking bed, but I am hoping it will start growing lovely warty roots soon.

Planning for Summer

Pumpkins, pumpkins, pumpkins

I have a clear plan for my Summer garden this year, and it involves pumpkins.

Pumpkins, you say?

Pumpkins, pumpkins, pumpkins.

Also, beans, eggplants, chillies, zucchini, cucumbers, and tomatoes.

But mostly, pumpkins.

To be honest, I love growing pumpkins much more than I love eating them. They are so beautiful, have so many varieties, and are just fun.

This year, in addition to the old faithfuls (Butternut, Buttercup, Queensland Blue), I am going to try:

All ordered online from the Diggers Club, the home of funky heirloom pumpkins.

On the bean trellis I am trying several kinds of climbing beans. I enjoy eating fresh green beans more than I enjoy eating pumpkins, to be honest, but for some reason, growing pumpkins is just so much more fun. So most available garden space will be handed over to the pumpkins. I may try a melon in with the pumpkins, despite my annual vow to never grow melons again.

Everything else (tomatoes, eggplants, etc) will go in the greenhouse. I ordered the eggplant, cucumber, and tomato seeds from Diggers Club and they arrived in less than a week, along with a native finger lime and lemongrass plant that I ordered on a whim, just coz.

On one sunny day when I felt slightly less like death warmed up, I staggered out to the greenhouse, masked up to avoid breathing in any dust and crud, and planted some eggplant and tomato seeds. Then I crawled back into bed.

Good job, soldier.

Which ‘Poos’ To Use

Manure is a critical ingredient in your soil health – both animal manures and ‘green’ (plant-based’) manures. I use both – but it can be confusing to know which kind of poo to use in your garden.

Green (Plant-based) Manures

Healthy Crop of Green Manure in my patch

Green manures are nitrogen-fixing plants that feed the soil from the nitrogen nodules on their roots. There are many different green manures – you can buy them easily from most nurseries and online. This season I planted a few mixes and a single species variety (fenugreek). Plant in a bed where you have had a heavy feeding crop like tomatoes – just bear in mind you will need to leave that plot aside for about 10 weeks. You won’t need to do much to it in that time while the green manures grows.

The trick with green manures is to cut them off at the base before they set seeds – either just before or just as they flower.

Chopped Green Manure

Once you have chopped them down, leave them alone to sit on top of your bed for another week or so. Don’t dig over the bed.

A week later, come back and dig the plants into your bed. Don’t be tempted to dig out the plants. This is when the magic happens! The nitrogen nodules will release their precious nitrogen into your soil at this point.

Come back a week later and dig it over again. Then let the plants continue to rot down. They will build structure into your soil.

You should do this in late Winter or early Spring, at least a month before planting Spring or Summer veggies. My soil here doesn’t warm up enough for Summer veggies until mid-late October, giving these plants plenty of time to rot down. I’m going to follow up these beds with a sprinkling of rock dust minerals and a bag of sheep manure and compost from my bins for extra nutrition and organic matter.

Animal Manure

Animal manures are useful in the organic garden. Vegans choose not to use these, as do some vegetarians. While I sympathise with these viewpoints, as a vegetarian I personally do choose to use these poos. Animal manures are a waste product and are a valuable soil amendment and compost activator. Aged and well-composted, they are safe to use in home gardens, including in soils used to grow vegetables and fruit.

Moreover, if we do not use animal manures to improve and amend our soils, where will the poo go? Landfill! Once there, manure will either break down anaerobically and create harmful greenhouse gases, or leach into waterways. In my opinion, not using manures is wasteful and harmful for the environment.

Some manures are better for the home garden than others. Different poos have different uses, and there are some I prefer to avoid (although some people do).

Compost Activators

I use some manures to activate compost. Compost is made up of ‘greens’ (grass clippings, kitchen waste, coffee grounds, and garden cuttings and weeds) and ‘browns’ (cardboard and paper, straw, dried leaves). A good blend of browns and greens is needed to make good compost – too many greens, and the compost will become anaerobic and smelly. Too many browns, and it will be too dry and will not compost quickly enough. To help your compost get moving and heat up, it helps to add some fresh manure.

I believe that the best manures to activate home compost are chicken, pigeon, rabbit, donkey, and horse.

Pigeon

Pigeon manure is the king of manure, in my opinion, but it is hard to get. My neighbour used to race pigeons and still has a coop. Every now and then, I find a bag of pungent pigeon poo at the bottom of our steps. No, he’s not sending me a message to get out of town – he’s giving me a bag of poop because he actually likes me, I promise.

Pigeon poo is very rich in nitrogen and must be composted for several months before it is ready to be used, or it will burn any plant it touches. Half a shopping bag in each compost bin sets the microbes to work like nothing else. Turn the compost once a month and in a few months it will be gorgeous.

Chicken

I also have ready access to fresh chicken manure mixed with straw from our coop, providing a mix of poo and browns in the compost bins every couple of weeks. Chicken manure is also very high in nitrogen, but not strong as pigeon. Every couple of weeks, I take a couple of inches of muck and crud off the top of their run, and dump that in the compost as well. That is also basically half-rotted chook poo and plants, and activates the compost almost as well as the pigeon poo.

Rabbit and Donkey

Very occasionally I receive a bag of rabbit poo from my brother-in-law. Rabbit poo is not high in nutrients but is light and dry and provides structure to the compost. Donkey poo is quite similar. You’d think it would be similar to horse manure, but actually it is quite dry and light, and provides both nutrients and structure to the compost. Due to the high likelihood of weed transference, it must be composted for at least six months.

Horse

Lastly, I occasionally add a couple of bags of horse manure to the compost bin. However, generally it is my preference not to use it. Horse manure can carry a lot of weed seeds. While their manure has value from a nutrient perspective and it adds good structure to the soil, it can bring weeds to the garden and must be composted for quite a while before use. I can get horse manure easily for free from the nearby race track, but for the most part choose not to because I have access to other manures. If I did not, I would use the horse manure, but would have to compost for longer than other manures.

Manures for use as a soil amendment

The only time I add manures directly to the garden without composting are already aged cow or sheep manure, which I buy from a trusted supplier, or pelletised chicken manure (for example, Dynamic Lifter). I never add manure that has not been well aged or composted directly to the garden. This is because fresh manure can cause several problems:

  • It can carry diseases that can transfer to the soil and the plants;
  • It can contain ungerminated weed seeds that can infest your garden;
  • If it is very high in nitrogen, it can burn plants.

My preferred aged manure is well-aged sheep manure, used as an amendment around fruit trees in Winter. Sheep manure is gentle, high in potassium but lower in nitrogen, adding structure to the soil without the risk of burning plants. There is a risk of some weed seeds transferring, but I have not had this issue.

Cow manure is also acceptable. Like sheep, they have four stomachs, which means their food is pretty well-digested by the time their manure is produced. As such, most weed seeds have been digested or killed off by the time they come out.

Dynamic Lifter or similar pelletised chicken manure products are commercially produced organic fertilisers, safe to use on the garden and high in nutrients. I use these directly on the garden at the start and end of each planting season to replenish the soil and feed the plants. While it is high in nitrogen, it will not burn plants due to its slow release, pelletised form. I use a similar organic chicken manure-based product to feed my fruit trees during Spring and Summer.

Poos to avoid

There are some manures I avoid. I believe that pig manure is a risk to the home garden, as it can harbour more disease than other manures. The home compost bin does not reach a high enough temperature to destroy these. Also it stinks like hell, which is a risk to neighbourly relations. I could end up with a less friendly bag of poo on my doorstep if I started using pig manure.

Cat and dog poo are not safe to use on the home garden, although there are composting units available specifically for dog and cat waste, these are to break it down so you don’t contaminate landfill, not to use it on your vegetable garden. Cat poo can carry diseases such as toxoplasmosis and should not be used in any garden where produce is grown for consumption.

It should go without saying, but human waste should also not be used on the home garden. Composting toilets have been in existence for many years, but most homes do not have these specialist facilities.

Planning the ‘Autumn’ garden

Green Manure Blend growing

Ahh, the Autumn garden…perfect for brassicas, leafy greens, turnips, peas! Autumn is one of the best gardening times of the year!

Or it used to be.

I was mulching the garden this morning when I noticed new blossom on the plum tree.

New blossom on the plum tree. In May. In South Australia.

One of these things just doesn’t belong here.

The fact is that over the past several years, Summer has blended into Autumn, which has blended into Winter. Our warmer weather is stretching out into our so-called Winter, and we have much-reduced rainfall. Last week, we had temps in the mid 20s.

I flew to the West coast last week, and as I sat by the window looking down, all I could see was an ocean of brown. Dry, brown fields, stretching from Northern Adelaide to the Spencer Gulf. When we drove into the town, I could see close up that trees along the roadside were dying from lack of rainfall. It was a shocking sight.

This all has a cost, both to our landscape and wildlife, humans who rely on it for their income, food, or recreation, and for those of us who try to grow gardens.

For me, that cost was borne home to me in a very concrete form when I received a huuuuge water bill last month – 3x our usual quarterly average for the Summer.

We expect a higher bill in Summer. You cannot grow a mini-orchard in Adelaide without irrigating. We accept that as part of the deal for the privilege of our land use. However 3x the average is crackers!

Last post, I mentioned my trial of no-dig gardening, (and my lack of success). That doesn’t mean I am 100% sticking with the way I have always done things. Obviously, I have to change how I garden and what I plant. And that includes in my Autumn garden, when in the past I could have naturally reduced how much I rely on irrigation in the garden due to the cooler weather and rainfall. The fact is, I can’t rely on that anymore. And I can’t rely on old methods and plants anymore either.

Doing things Differently in my Autumn Garden

In previous years, this Autumn would be peak brassica planting season. I love to grow broccoli and romanesco especially. I also usually grow a lot of kale, turnips, and swedes (also known as rutabagas). I often grow onions, put in at least one patch of garlic, and some silverbeet.

Romanesco Broccoli

All of these plants are heavy feeders, especially nitrogen. They take a lot from the soil without giving much back, and they do require a lot of water. That’s no problem when there is decent rainfall. But I can’t rely on that anymore.

This Autumn, my soil is not in great condition. As I mentioned in the last post, when I dug it over recently, I found it was full of roots and rocks. After months of heat and little rain, it lacked structure. I decided that the whole garden needed a rest and time to recover.

However, nature abhors a vacuum. If I plant nothing, weeds will happily jump right in. So, this season, I decided to plant high nitrogen crops to feed the soil and help give it back structure, organic matter, and nutrition.

Before planting, I spread generous amounts of pelletised chicken manure across the soil and raked it in. Then I planted legumes and green manure across the whole garden. I chose dwarf snow peas, climbing peas, broad beans, sweet peas, fenugreek, and a green manure blend. After planting, I mulched with chopped sugarcane mulch.

Broad beans

My intention is to water up to once a week from now until Spring, but only if the soil under the mulch is dry. Otherwise, this patch must now fend for itself. Fruit trees will continue to be watered if needed. If we get a crop of snow peas or broad beans, that will be great – but it is not my primary goal. Once these plants reach maturity, I will chop them down, leaving the roots to release their nitrogen in the soil as they die, and chop up the plants on top for new mulch.

My only concession to other veggies in the garden is a punnet of Tuscan kale, which I have popped in one corner. I love kale and it does not do well in the greenhouse at all – just too warm! So, it does get some space in the patch and hopefully will not require too much water.

The Autumn Greenhouse

I still want some veggies for our household over the Winter months, but I am focusing my efforts on the greenhouse, where I can control much better how much water I use. I have two large wicking beds and four troughs. I am growing leafy greens (lettuce, spinach, bok choy) and herbs (dill and coriander) in these, as well as trialling root vegetables in the wicking beds (leeks, celeriac and radish). I have really tried to consider what we like to eat over the cooler months, and what would grow best in containers.

Hopefully, the greenhouse will not be too warm for these winter leafy greens. I had great success with dill and spinach in the greenhouse last year. It was the best spinach crop ever, and lasted for months and months. Let’s hope for another bumper crop this year!

How about you – are you adapting your garden style or plants due to weather conditions?

To dig or not to dig?

Roots dug out of one bed

If you have been gardening for a while, and you read or listen to garden media, you have probably heard of the ‘No Dig’ method. First popularised by Esther Dean in the 1970s, and more recently by Charles Dowding, a British gardener, the theory is that healthy soil should be as undisturbed as possible.

Esther Dean’s original ‘No Dig’ garden method was about building a garden easily in an area such as lawn or in heavy clay soils where digging a patch would be difficult, for example. I have built several of these over the years with success.

However, the more modern iteration is a bit different. It would be more accurate to describe modern ‘No Dig’ gardening as ‘Anti-Cultivation’ gardening. Proponents argue that by not digging or regularly cultivating the soil, we protect the soil biology, which leads to better garden productivity and soil health.

This version of ‘No Dig’ doesn’t mean never digging a hole (for example, to plant a tree). ‘No Dig’ means minimally cultivating your soil while adding copious organic matter to the soil. For example, a no dig approach would mean not digging over your patch at the end of the season after removing the spent plants, then replenishing your soil by adding compost and other organic matter to feed your soil.

Many leading gardening advocates have promoted this theory in recent years. There’s a lot of ‘before and after’ photos or ‘side by side’ photos on websites that apparently show the benefits of ‘No Dig’, but to be honest, that is not convincing to me. I prefer data, not anecdotes (please note that what I am about to describe is the very definition of ‘anecdotal evidence’). However, as more gardening experts extolled the benefits of this approach as the best way to treat your soil microbiome, I decided to give it a try.

My Approach

In the past my approach to soil health has comprised some similar ideas to the No Dig gardeners. I always add organic matter (homemade compost), dynamic lifter (pelletised chicken manure), and mulch (usually chopped sugar cane mulch) at the end (or beginning) of each gardening season. Sometimes I also sprinkle rock dust on the soil. Every fruit tree receives a bag or two of aged sheep manure in Winter, followed by an organic fruit tree fertiliser each month during the growing season. However, at the end of each planting season, I have always cultivated the whole garden bed with my trusty fork first before adding the organic matter. This has been my routine for ten years.

This Spring, following the ‘No Dig’ approach, I did not fork over the soil as I would usually do – I just left it alone. I did everything else the same.

The Results

My results were not great, I have to be honest. I put this down to a number of factors, which include the fact that South Australia is in a drought – we have had just a third of our average rainfall so far in 2025 and according to the ABC, we are experiencing the driest recorded year since 1849. Street trees across the region are dying. My water bill was three times the usual, mostly because I have been trying to keep my many fruit trees alive.

I am used to gardening in dry conditions. What I noted when trialling this method is that my veggies were generally more unproductive than in other seasons. Even pumpkins, which I always have success with, shrivelled on the vine (with hand pollination)! Nothing in the veggie patch really seemed to take that well, except for the green beans (and of course, the plants in the greenhouse, but they were not grown with this method). Everything else just seemed to sulk.

Again, this could have been related to weather conditions. However, the opinions of long-range weather forecasters is that these are the conditions we can expect in South Australia from now on. If that is the case, then I cannot expect that this approach will help me with this poor growing conditions. If anything, what I will need is to completely change what I grow and when. I’m looking into that now.

This week, a little later than usual (due to the a recent trip to New Zealand), I pulled out all my very sad looking plants. After a poor season, partly due to the very dry season and possibly the No Dig/Anti-Cultivation method, I decided to revert back to my old ways and dig over my bed. What I discovered astonished me! My previously beautiful, dark, friable soil was full of roots and rocks, all through the bed. I dug out over two kilos of roots of unknown origin from one 1m x 2m section of garden bed. My previously healthy, well cultivated soil was now some kind of playground for roots from…well, I have no idea. Now I know one possible reason my plants were sulking and unproductive – they were competing for water and nutrition all Summer long.

Again, these roots could have been due to the dry conditions. A tree or plant from a neighbouring garden, or even from one of my own fruit trees elsewhere in the garden, could have sent roots through to find water. This probably started in the Spring (we have been in drought for a long time). If I had dug the patch over earlier as usual, I could have nipped it in the bud as I would have discovered some of this earlier. I don’t know where all the rocks came from, but there were so many!

The current version of the ‘No Dig’ garden method was developed in the UK. Charles Dowding has stated that this method can work anywhere. I am not sure that can be the case for any gardening method. It’s also unnecessary, in my opinion, to try to make the case that one method can be successful in every climate and region. If ‘No Dig’ is best suited for cool temperate regions like England, Tassie, or New Zealand, that is fine. Those regions are famous for their regular rainfall (I just visited a part of New Zealand that receives 10 METRES of rain a year! Inconceivable!). South Australia, unlike New Zealand or England, is famously the driest State in the driest continent in the world – and this year, it is even drier.

On his website, Charles Dowding states that “good soil feels naturally firm, or even hard, especially when dry.” He says that this is good for plants to grow in, as this means that it has good drainage and air channels. I believe that in climates with decent rainfall, this might be the case. But in Adelaide, our soil is regularly cooked throughout the season from Spring right through to late Autumn by baking hot sun – in full afternoon Summer sun, the temperatures can easily reach above 50 degrees Celsius. In other regions of South Australia, it gets even hotter. Our soil is not just ‘naturally firm.’ It can be rock hard, cooked by an unrelenting sun and no bloody rain. That has to make a difference in how we approach gardening, and how we treat our soil.

I agree we need to take much, much better care of our fragile soil than we have in the past. I am just not sure this approach is the best for my soil in my garden. I am sure that ‘No Dig’ is a successful approach for some folks in some climates. Perhaps if I had the time, patience, and different climactic conditions, it would work out well in my garden over time. But I believe that for my patch and weather conditions, it was unsuited.

How about you – have you tried the ‘No Dig’ or a No or Low Cultivation method in your garden? I’d love to know if it was more successful than my effort – let me know in the comments!

Mulberry Success

When we first moved into our place about ten years ago, I knew I wanted to grow fruit trees. Our block is not ideally situated for this, in all honesty. It slopes awkwardly, and the front yard is North facing. The soil was very poor limestone. It was planted with eucalypts and palms, with weed matting throughout. The backyard was closely planted with huge conifers and agaves. We paid an arborist to remove the trees and my husband tackled the agaves, and with a blank slate, we planned the garden. Our goal was to have a mix of productive and sensory plants, with the intention to always have something edible to pick from the garden at any time, whether it be herbs, fruits or veggies.

A decade later, we have a large herb, sensory, and veggie garden on rich soil, and about twenty different fruiting trees. In the front garden, this includes a black mulberry tree, which was planted nine years ago.

I love mulberries, but you can’t buy them in the shops. I have fond memories of visiting my friend’s house in the Summer, climbing her huge mulberry tree and sitting up there and searching around, finding the little black jewels. I still like ferreting around the tree, searching around jewel-like fruits to find the black, ripe berries. They look like they belong in a fairy story.

Mulberries are not a commercially viable crop. Picking them takes ages, as the berries ripen at different times. You have to walk slowly around the tree to find the couple of berries per branch ready to pick. They don’t transport well, and the shelf life is not long. So if you want mulberries, you have to grow them. And they are an acquired taste. Not really sweet like commercial berries, mulberries are tart-sweet with an underlying metallic taste that some people do not enjoy.

However, they are hard won. I was not expecting to have much of a crop for the first couple of years, but in the past few years we have waited expectantly for fruit that never came. We have had a couple of dry, tasteless berries each season, then the birds have carried off the rest. Last season, I was despondent, then threatening. I told my husband, “That bloody tree has one more season to produce some fruit, or it’s gone!” Then I thought, as with many garden-related issues, maybe the problem isn’t the tree – maybe it’s the gardener.

It didn’t fill me with joy to admit it, believe me. I don’t want to accept that perhaps I had been neglecting the tree. After all, the apricot tree gave us a bumper crop last year. So did the lime tree. Clearly, I could get a tree to produce fruit. But just as different kids need different parenting techniques, so might different fruit trees. So, I read up on mulberry trees. Any info I could find on mulberries, I consumed. Of course, there were differing opinions. Some said prune. Some said don’t prune. But almost all the experts agreed mulberries needed two things in abundance.

Water and fertiliser. Not so revolutionary after all. Turns out, I had been underwatering and under-feeding the poor tree. I upped the water, which makes a lot of sense on our north-facing hillside (deep water, once a week), and increased the nutrition. From early Spring, I fed the tree with a couple of handfuls of organic fruit tree fertiliser every month around the base of the tree, watered in well.

Check it out:

Oh yeah, baby. Mulberry time.

What I’m growing this Summer

I’ve been a bit late to planting this season, because I’ve been working non-stop, seven days a week. Unfortunately, just at the best possible time of year to be out in the garden, I am also usually the busiest, work-wise. My little office overlooks my front garden, and I have been watching the Spring garden bloom away while I have been working away. It’s kind of a bummer, to be honest. But not having any money is also kind of a bummer, so I have sucked it up and looked forward to the time it all settles down and I can get back out there.

That time is now, before the next major project starts (any day now). Carpe diem, my friends.

This weekend I spent the first full day in six weeks out in the garden. There was a *lot* to do out there, from digging up the used brassica plants, to a heckton of weeding, to feeding and mulching, to planting. Let’s just say at the end of the day I was in some state of pain. Seven days a week sitting at a desk is not good conditioning for a day spent digging and weeding.

It was lovely though, to be outside in the sunshine, not thinking about the election of schmonald schrump and focusing on what I can personally do to make my little patch of the world more beautiful and sustainable and healthy.

I tried to make some ruthless decisions about what to plant this year, based on experience about what has continually succeeded and failed in my garden over the past couple of years. I’m kicking out melons this year, and have carefully selected the type of eggplants, chillies, and capsicums. I tried to reduce the number of tomatoes but I have to admit I failed at that, big time. I’m trying to grow a lot more beans (both bush and climbing).

I am continuing the okra experiment, but it is not going well at all. After transplanting from the greenhouse, they are spindly and slow-growing. My husband thinks they will do better in the greenhouse as it is more humid, and he may be right, considering their natural habitat. I might plant some in the greenhouse and compare their growth to the open garden beds. I know that the cucumbers do not do well in my open garden beds, but in the greenhouse they do really well.

ladies fingers lot
Photo by Quang Nguyen Vinh on Pexels.com

The cucumbers are getting even more greenhouse space this season – we love them fresh and pickled, but it does depend on the pickle recipe. I did both sliced and spears last season, and the spears recipe was not very tasty (waste of delicious cucumbers!). We still have some and I will get through them, but it makes me a bit cranky when I make a pickle recipe that is not as delicious as it should be. There is no excuse for a bad pickle, when they could be so good.

Zucchini, squash, and pumpkins are also getting generous garden space. Last year’s pumpkins were a bit average. I love growing pumpkins, but I grew an heirloom variety that did not do well and wasted a whole season and a heck of a lot of garden space (Wrinkled Butternut – way less productive than the regular tried and true Butternut and much less tasty – my recommendation is not to bother). This year I am still experimenting with an heirloom (Musque de Provence) but also growing the tried and true Kent, which always kicks butt in my patch. From now on, I will combine an experimental pumpkin with a trusted variety so if the experiment does not work out I will still have the trusted pumpkin in pocket.

This year I am growing:

  • Beans: Kentucky Wonder Wax (Climbing), Cherokee Trail of Tears (Climbing), Goldrush (Bush). When I spotted Cherokee Trail of Tears I knew I had to grow it. This was apparently the bean that the Cherokee brought with them from their homelands and carried it with them all along the Trail of Tears – heirloom seeds tell a story of the people that have grown it, and this is a devastating story of horror but also resilience. To grow it and save the seeds is to honour their resilience and history;
  • Capsicum: Yolo Wonder, Sweet Chocolate;
  • Chilli: Anaheim, Jalapeno, Serrano;
  • Cucumber: Marketmore, Dragon’s Egg, Jefferson, and another one I can’t remember the name of! I grow Marketmore every year, it is a real trooper of a cuke, good disease resistance and is prolific;
  • Eggplant: Listada Di Gandia, Tsakoniki;
  • Okra: Clemson’s Spineless, Crimson;
  • Pumpkin/Squash: Kent, Musque de Provence; Oregon Winter Squash; Squash Sweet Dumpling.
  • Tomatoes/Tomatillo: Black Cherry, Black Russian, Jaune Flamme, Costoluto Fiorentino, Azoychka, Tomatillos;
  • Zucchini: Tromboncino, Ronde de Nice, Cocozelle.

This year’s planting decisions were made based on: what we like to eat and the cuisine we mainly cook (Indian, Italian, Mexican, all vegetarian), what grows well in my garden, what I have space to grow, watering requirements, and what I have the time to take care of.

How about you – what are you growing in your patch this Summer?

Wicking Beds

Wicking Beds are gaining in popularity in Australia due to their water saving capabilities. They are designed to draw water from the reservoir at the base of the bed, rather than from top-watering, which reduces evaporation and saves water by up to 50% on conventional raised beds.

I have been interested in them for a while, but I don’t have the skills to build a wicking bed (nor the time, or interest to learn, frankly). When I researched them, I found instructions to build a wicking bed (no thanks), or a range of options to buy ready-made at very different styles and prices.

Finally, I chose a South Australian company selling via Facebook Marketplace. These are built from reclaimed timber, which was attractive to me as a more sustainable option than the fancier models using virgin materials. These aren’t as stylish as some of the models I have seen, but they are sturdy, sustainable, cheaper, and easy to use.

Wicking beds in unpainted state

I bought two beds to fit in the greenhouse, with the intention to grow tomatoes and eggplants. I was not happy with the eggplant crop last year, and while we had some good tomatoes last year I know we can do better.

Each bed is lined with thick plastic, and has a tap for overflow (pictured above). The box at the end is for storage (tools etc). The blue cloth you can see in the picture is used to stop the soil falling into the scoria once the bed is filled.

Preparing Wicking Beds

To protect the beds from sun and water damage and make sure they last as long as possible, the wood should be coated before use. You can choose oil, wax or paint. I chose to use exterior enamel paint, after first considering beeswax, boiled linseed oil, and decking oil. Exterior paint was the cheapest option, would last a long time, and as the wicking bed is lined and the paint was only used on the outside of the beds, was a safe solution. A light sand, and then three coats of exterior paint in pale eucalyptus (gloss) and they were ready to go. We had been painting our kitchen that week, so it was not much more effort to paint the wicking beds at the same time, and I think it was worth it.

Filling Wicking Beds

The base of the wicking bed should be lined with a medium such as scoria (volcanic rock) or perlite. I chose scoria as this was recommended to me by the company that built the wicking beds, and is more than half the price of perlite. However, it is much heavier, so be sure about where you want to place the wicking beds before you add it as you will not be able to move it again once you load it up with the scoria! I have accepted that these beds will be there forever now. I suggested to my husband that I could be buried in one of the beds when I die. Cheap funeral. He did not think that was funny. At all.

After placing the scoria (about five bags per bed), it is lined with the shade cloth, and then the soil is added. I used a mix of straw, compost, and potting soil, and watered in some soil wetting agent to make sure the soil does not dry out.

Watering the Wicking Beds

Each bed comes with a fill pipe in the corner. Using a hose, fill the bed through the fill pipe – too easy! You will know to stop if the overflow tap….overflows.

I have tomatoes and eggplants in the wicking beds. Each bed is also mulched to reduce evaporation. The beds comfortably fit four tomatoes and four eggplants each, as well as some basil. . The results have been remarkable. The tomato plants are enormous and healthy.

I am already planning to buy another wicking bed. I believe they have been worth the money. The wicking beds are 1.5 metres long and 60 cm wide, which is pretty large. These beds are not as pretty as some of the schmick wicking beds I saw online, but at easily half the price of many of the models I reviewed, I think they make up for it in utility. At a cost of $349 each (not including paint and filling), I would not say that these are cheap, but they are definitely not the most expensive option on the market either. These beds will help me achieve my dream of an almost self-sustaining vegetable garden, and as I age, I will be able to continue using my greenhouse easily without bending – this is becoming a more important consideration in my garden with every passing week, it seems. Cared for properly, they should last many years.

What else has been going on in the patch?

I have been out of action on the blog and in the garden due to a huge workload and project deadlines. While I have been ignoring the patch, it has continued to show the love with non-stop veggie production: broad beans, snow peas, spinach, and broccoli. When the kids ask me “what’s for dinner?” the answer over the past two weeks has been “something with broccoli” as we have had so much of it!

Our fruit trees are in full Spring production mode, including our Smyrna quince tree, which is so exciting! Planted and espaliered a year ago, you can see it was in full flower in its second season (this photo was taken a few weeks ago – it is now covered in baby quinces). I love quince flowers and adore quince fruit, so am delighted to watch them develop. We also have plums, mulberries (heaps of them, finally!!), avocadoes (for the first time), apricots, limes, and a potentially huge crop of apples and pomegranates. I don’t want to get ahead of myself as there are a good couple of months to go yet, but if all goes well it will be a bountiful Summer and Autumn. I’m helping things along with regular watering and feeding with organic fruit tree fertiliser monthly.